This post contains affiliate links (I get a commission at no extra cost to you for purchases made through links in this post).
If you are an RVer, one of the must-have items is the Eternabond roofing repair tape; a roofing sealant that uses micro sealant technology. It seals and stops leaks on your RV’s roof immediately. Suppose when resealing your RV roof, you find that the tape is too thin to cover the area you want to reseal; can you overlap Eternabond tape?
You can overlap Eternabond tape while resealing the RV’s roof, as the tape bonds well with almost anything. So, if the Eternabond tape is too thin for the part you want to reseal, you can overlap a piece on top of another. Overlapping the pieces of tape enables you to reseal a more extensive area.
In this article, I’ll explain why it’s okay to overlap Eternabond bond tape while resealing your RV’s roof. I’ll also tell you the benefits of overlapping Eternabond and give tips for overlapping Eternabond tape while resealing your RV roof. Here we go.
When Is It Necessary to Overlap Eternabond Tape?
Eternabond tape comes pre-cut to different widths and lengths, like other professional adhesive tapes. You, therefore, purchase the sufficient size for the part of the RV roof you wish to reseal. However, when the area you want to reseal is wider or longer than the tape, it is necessary to overlap the Eternabond tape.
For instance, the popular Eternabond tape sizes available on Amazon.com are:
- 6″ x 50′ (.15 m x 15 m) Eternabond RoofSeal white tape
- 4″ x 50′ (.10 m x 15 m) Eternabond RoofSeal white tape
So, suppose the part of the RV roof you want to reseal is 5″ by 20′ (13 cm x 6 m), and you have a 4″ by 50′ (10 cm x 15 m) roll of Eternabond tape. In such a case, it’s necessary to overlap pieces of the Eternabond tape to fit the area you want to reseal.
Here’s how to overlap the Eternabond tape in such a scenario:
- Cut two pieces of the 4-inch (10 cm) wide Eternabond tape, giving you a total width of 8 inches (20 cm).
- Fix the first piece on the part you want to reseal and ensure that it extends at least an inch beyond the affected area.
- Fix the second piece of the tape on the remaining area and ensure you overlap it at least an inch over the edge of the first tape.
- Remember to extend the second tape piece at least an inch beyond the affected area.
In other words, the need to overlap Eternabond tape will often arise. It all depends on the length and width of your tape vis-a-vis the area of the RV roof you want to reseal.
Remember that in most cases, you can put on new lap sealant over old lap sealant on your RV roof. Suppose this is a suitable option for you. In that case, it can, in many cases, be the better option than using Eternabond tape, as that generally should be considered an emergency repair or a patch job.
Read more about when you can put on new lap sealant over the old one in this article I have made for you about it.
Why It’s Okay to Overlap Eternabond While Resealing RV Roof
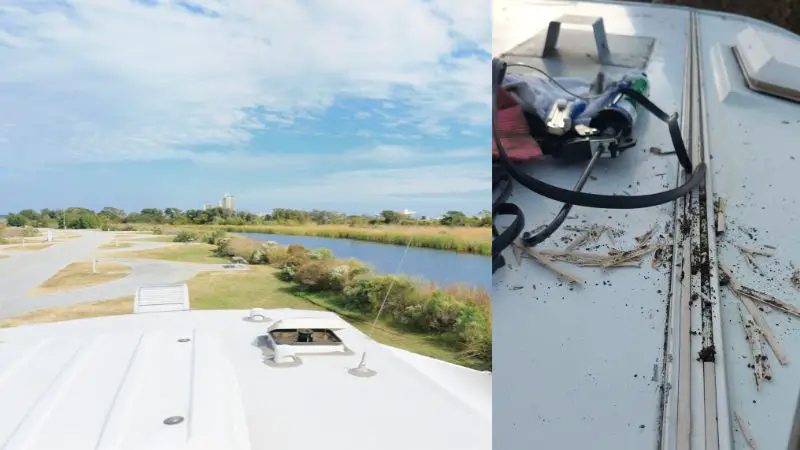
One of the worst nightmares of an RVer is a leaking roof, as it can cause untold damage to the RV. Fortunately, you can prevent or reseal small holes, torn seams, and leaks on the RV’s roof using Eternabond tape. One side of this tape is laminated, forming a sturdy backing material, and the other has a release liner.
As I mentioned, you can overlap Eternabond tape while resealing the RV roof if your tape is thinner than the area you want to reseal. In such a case, you end up using several pieces of tape, and overlapping them in the process is quite okay.
Below is a big reason why it’s okay to overlap Eternabond tape while resealing your RV’s roof:
Eternabond Tape Bonds Well to Almost Anything
Eternabond is manufactured using synthetic polymers and has a proprietary built-in primer. These properties enable the Eternabond tape to bond with almost anything strongly. So, when you overlap pieces of Eternabond tape, they form a strong bond, creating a lasting seal on your RV’s roof.
For best results, applying enough pressure on the Eternabond tape after overlapping one piece on top of another is essential. The benefits of using sufficient pressure when overlapping Eternabond include:
- The pressure helps to form a solid bond between the layers of Eternabond tape.
- It also helps to prevent water from penetrating between the layers of Eternabond tape.
Benefits of Overlapping Eternabond While Resealing RV Roof
So, as I’ve mentioned above, you can overlap pieces of Eternabond tape if the tape you have is too thin to cover the area you want to reseal. When overlapping Eternabond, you typically overlap the area around the edges of the tape.
Here are some benefits of overlapping Eternabond tape while resealing an RV’s roof:
- Overlapping gives the edges an extra layer of protection: When you overlap the edges of Eternabond tape when using several pieces of tape, you give the edges an extra layer of protection. This protection is good as most of the wear and tear of Eternabond tape starts from the edges.
- Nothing harmful can pass through the overlap: Overlapping the edges of the Eternabond tape prevents harmful things like dust, water, and snow from passing through the tape’s joints. This helps to keep the tape intact for years.
While you are at it and repairing a leak with the eternabond tape make sure that you take the time to reseal your whole roof properly.
Before you get started on that, make sure that you know what type of RV roof you have and how to seal that type of roof best, as it differs and can be confusing I made another article on how to reseal the different RV roof types that you should take a look at.
Tips for Overlapping Eternabond Tape While Resealing RV Roof
Suppose you want to overlap pieces of Eternabond tape while resealing your RV roof. In that case, it’s essential to overlap appropriately and use the right tools.
Below are some tips on overlapping Eternabond tape while resealing your RV’s roof:
- Clean the roof of the RV before installing the tape because the Eternabond doesn’t work efficiently on a dirty surface.
- Ensure the RV’s roof is dry because Eternabond tape doesn’t augur nicely with wet surfaces.
- Install the tape on a warm day because the warmer the tape, the stronger the adhesion.
- Ensure that each tape you apply extends at least an inch beyond the affected area for lasting results.
- Ensure that the tapes overlap at least an inch on top of each other to keep away dust, water, or ice.
- Apply pressure on the overlapped parts; the pressure activates the adhesive and helps to create a tight seal. You can use a small steel roller to apply the pressure.
- Always inspect your work after applying the Eternabond tape. Look for folds, air bubbles, and other imperfections and fix them.
Conclusion
Eternabond tape is among the most trusted sealants in the form of tapes. It’s excellent for resealing all RV roofs regardless of the materials making the roofs. When you use Eternabond tape to reseal your RV’s roof, it’s sealed semi-permanently and can remain intact for years.
If you want to reseal a large area of your RV’s roof and the Eternabond tape you have is too thin, you can overlap pieces of the tape until you seal the whole area. If you do the resealing correctly, the Eternabond does a great job and gives you value for your money.