
This post contains affiliate links (I get a commission at no extra cost to you for purchases made through links in this post).
If you’re new to RVing, you should know that winterizing helps protect your vehicle from damage by plummeting temperatures. Otherwise, you may have to spend vast amounts of money on repairs. So how does winterizing your RV water pump work?
Winterizing your motorhome or RV water pump is done by ensuring that there is no water left in it or by pumping RV-antifreeze through the pump to ensure that no water can expand as it freezes and result in damage. It is done by the same procedure as when you winterize the rest of your RVs water system.
In this post, you’ll find a step-by-step guide for winterizing your RV water system and more details on your water pump, tips on what to do during the process, and some expert advice.
Winterizing Your RV Water Pump: A Step-by-Step Guide
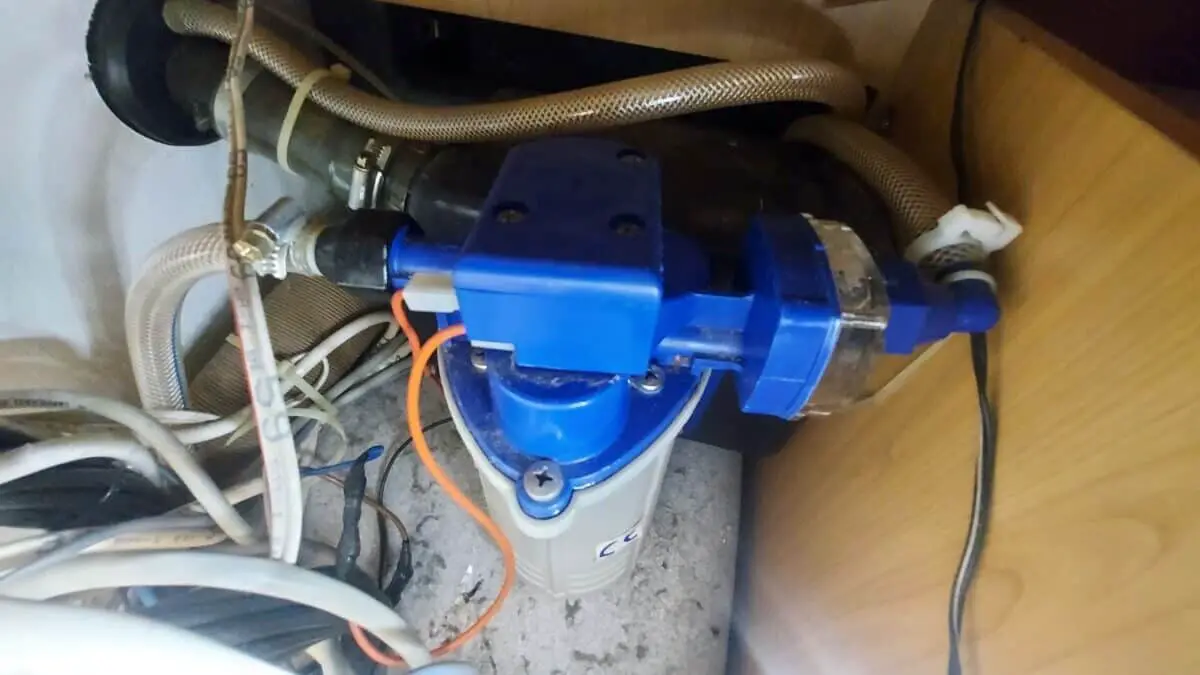
As I mentioned in my previous article, your RV water pump can freeze if the outside temperature drops below freezing temperatures and your RV furnace isn’t on to keep the temperature around the water pump above freezing.
When water freezes, it expands. This process may cause your water pump or water pipes to burst or leak, and there may even be a complete blockage of the inline plumbing system.
The main reason you winterize is to drain away all the water in the system so there is nothing that can freeze and expand or replace it with antifreeze, which remains in liquid form even at freezing temperatures.
You can hire professional help to winterize your RV. However, it is something that every RV owner should know how to do and handle on their own, in my opinion. It is an easy process that, if done properly, will also teach you a lot of valuable things about how your water system work that you will have use for the whole year.
Step 1: Prepare Your Materials and Tools
Depending on how ambitious you want to be with this process, some materials might be required, although rest assured that they wouldn’t be needed. When winterizing your RV water system, it is a great time also to clean all the holding tanks as well, and if it is the first time you use RV antifreeze, some additional things could help out.
- Water heater bypass kit (only If you can’t bypass your water heater and want to use antifreeze)
- Cleaning wand for the black tank (if a cleaning system isn’t installed or you use a cassette toilet)
- Water pump converter kit or tubing to connect to the water pump valve (only if you want to use antifreeze and limit the amount you need to use)
- A few gallons of non-toxic RV antifreeze. The exact amount you need varies depending on the length of the plumbing lines. (Unless you choose to skip the antifreeze as I do)
You can read more about winterizing your RV without antifreeze in this other article I have written for you.
Step 2: Drain All the Tanks
A tip if you have the water heater on and some hot water at your disposal is to first use this water by simply turning on the faucets and drain it down the grey tank to use that hot water to clean out the grey tank as well as the black tank that will make cleaning those much easier since hot water disolves grease.
And then turn off your water heater as you don’t want it to be warm when you drain it in the fourth step.
- Drain the tank holding fresh water; here, I have made a video where I also show you how to quickly clean the grey tank at the same time in an easy way.
Then it’s time to drain your black water tank and clean that one out if you want to keep it fresh and your level sensors working.
And lastly, we drain the gray tank. If you are unsure how to clean the gray tank or what greywater is and how that system works, I have made another video showing all of that as well.
Make sure you flush all water from the tanks. The reason for draining them is to remove any water therein that’d otherwise get frozen.
Remember the reason we are doing this is to not have water that freezes and expands and therefore brakes something as it expands so if there is just abit of water left in one of the holding tanks that wont matter as it has space to expand, but if you have the water pump or a water pipe full of water and there is no room for it to expand that will be more dangerous!
Also, when water stays in a tank for a long time without cycling out, it leads to the growth of bacteria that can ultimately damage your plumbing system.
If the tank has no flushing system, use your cleaning wand to clean the black tank.
Remember that you need to empty the gray and black tanks at designated dumping facilities, and here is how I find those facilities when im not at a campground.
Step 3: Drain the System
For safety reasons, do not drain the RV water heater while it’s hot or under pressure.
Instead, follow the steps below:
- Unhook the RV water supply. (if connected to city water, this is not used in Europe)
- Open a water faucet for a short time until it starts coming out some air and not a steady water flow to pump out some of the last water from the water pump and system, don’t run the water pump dry longer than you have to.
- Switch off the water pump.
- Open all water faucets, shower, kitchen sink, and toilet sink on both hot and cold to expel the pressure from the system and drain part of the pipes.
- Allow the hot water tank to cool before draining.
- Once the water heater is cool, remove the drain plug or open the drain valve to drain the unit. You can increase the speed of the drain by opening the pressure relief faucet. (Also not used in Europe)
- Locate the low-point water system drain plugs or valves and open them as well.
- Remember to flush the toilet so no water is left there, either.
- Keep all the faucets open during the winter if you have some water left in the system that freezes and expands. There won’t be a pressure build-up that can brake something. Instead, the pressure will go out through the faucets.
- For the same reason, it can be good also to keep the drain valves or drain plugs open to relieve eventual pressure build-up in the system as some water that might be left freezes.
9. Keep all the faucets open during the winter
Here’s a helpful YouTube video I made explaining how to drain your RV water heater; I also show where my drain valves are located and how bypassing the water tank works that could be helpful for you.
If you are not using antifreeze you are done with winterizing your RV water pump and system already! congratulations on learning a new skill!
Step 4: Disable the Water Filters
Only necessary if you will use antifreeze. Check and remove or bypass all the inline water filters in the system, as antifreeze can easily damage them. According to the RV expert Mark Polk, this is your opportunity to check whether these water filters are functioning optimally. If not, you need to replace them anyway.
Step 5: Bypass the Hot Water Tank
If you’re about to pour antifreeze into the system, you must bypass the water heater first. Otherwise, you’ll waste 2-10 gallons (9-45 L) of antifreeze, depending on the size of your water heater. If your RV doesn’t have a bypass kit installed, and you want to use antifreeze, have that installed before continuing.
I have never seen a bypass kit installed in any European RV. Still, on the other hand, in the USA, and for the bigger motorhomes or fifth-wheels, I know that it is very common as the use of RV-antifreeze is the norm in the USA and Europe I have never heard of it; we drain the water systems properly instead.
Although it could have something to do with the bigger rigs that are common in America and how the plumbing is made on those versus the smaller RVs we use in Europe, that we have an easier time draining our systems properly with fewer water locks or something, but that’s the only thing I can think about that could explain the difference.
Step 6: Add Antifreeze to the System
If you choose to add antifreeze to the water system to ensure that there is absolutely no water left or if there is, it will be mixed with the RV-antifreeze ensuring that it won’t freeze during the winter. Now is when you want to fill up all your water pipes and water pump with it.
This can be done in many different ways, by pouring RV antifreeze into your fresh water tank and then starting all the taps to pump it from there through the whole system, using a special hand pump connected to the city water inlet or by disconnecting the water hose that goes from the water pump to the freshwater tank and replacing it with another hose going directly to the antifreeze bottle.
Anyway, at this stage, you need the following:
- RV-antifreeze 1-3 gallons; you will need enough to fill all water pipes and some extra to pour down the drains.
- Water pump conversion kit or a hand pump for the city water inlet. This should come with a user manual on installing and using it to pour antifreeze into the RV plumbing system. (optional)
If you choose to use a hand pump and pump it through the city water inlet while pumping antifreeze into your RV, I recommend using Camco Antifreeze Hand Pump Kit (available on Amazon.com). This kit includes a hand pump and two sections of flexible hose with low lead content. The product complies with Vermont Act 193, AB1953 Low Lead Laws, and California’s Prop 65 Regulations.
Either way, I recommend you to watch their video, as it quickly and easily shows how you use this method of filling your water system with antifreeze.
Although be aware that if you only use that option you will not have filled the water pipes going from the fresh water tank to the water pump nor the water pump with RV-antifreeze!
If you instead want to fill your system with antifreeze directly at the intake of your water pump, and maybe you already have a connected hose for that purpose, you should check out this video that Ross from RV tips and travel made that I think is great. Unfortunately, I don’t have that type of system, nor do I usually use antifreeze, so I can’t show you myself.
If you instead want to pour antifreeze directly into your fresh water tank and then pump it through the whole water system, you can do that as well although remember that this way, you will not get the antifreeze to the city water inlet pipe; therefore a combination of multiple soulutions could be desirable.
A combination of multiple soulutions could be needed to get antifreeze throughout all of your RVs water system.
Step 7: Release Pressure Buildup
Your last step is to relieve the system by releasing pressure buildup. Do that as follows:
- Push down the system inlet valve using a screwdriver until antifreeze flows out.
- Close the system and double-check that all faucets are closed and the RV water heating system is shut.
Final Thoughts
Using antifreeze in your RV is an easy way to reduce water line damage and costly repairs if you cannot drain all the water from your water system properly.
You must change your antifreeze every year and keep an eye on your system throughout the winter to prevent it from freezing. Choose a product with at least 50% ethylene-glycol to protect your plumbing. Inspect for damage or leaks, especially when traveling in colder weather, and check the system before heading out on your next adventure.
Sources
- Science ABC: Why Does Water Expand When It Freezes?
- National Institutes of Health: Microbes in Pipes (MIP): The Microbiology of the Water Distribution System
- Today’s Homeowner: When to Close the Pressure Relief Valve While Draining a Hot Water Tank
- KOA: 7 Easy Steps to Winterizing Your RV Plumbing System
- Motorhome King: RV Water Pumps Can Freeze! Here Is How To Fix & Avoid It